Tutorial: Forecasting Github Daily Active Users
In this notebook, we show how to use Deep4Cast to forecast a single time series of Github daily active users. The data can be gathered from Github Archive and is entirely public. The idea here is to show how to handle a short timeseries with many characteristics, e.g., positive values, trending, multiple seasonalities, etc.
[1]:
import numpy as np
import pandas as pd
import datetime as dt
import matplotlib.pyplot as plt

import torch
from torch.utils.data import DataLoader

from deep4cast.forecasters import Forecaster
from deep4cast.models import WaveNet
from deep4cast.time_series_dataset import TimeSeriesDataset
import deep4cast.metrics as metrics

# Make RNG predictable
np.random.seed(0)
torch.manual_seed(0)
# Use a gpu if available, otherwise use cpu
device = ('cuda' if torch.cuda.is_available() else 'cpu')

%matplotlib inline
Forecasting parameters
We first need to specify how much history to use in creating a forecast of a given length:
- horizon = time steps (days) to forecast
- lookback = time steps (days) leading up to the period to be forecast
[2]:
horizon = 90
lookback = 256
Dataset
Loading and visualization
The data set consists of only one time series, Github daily active users, that we want to model.
[3]:
from pandas.tseries.holiday import USFederalHolidayCalendar as calendar
# Get data
df = pd.read_csv('data/raw/github_dau_2011-2018.csv')
# Remove NaNs
df = df.dropna()
# Convert date to datetime
df['date'] = pd.to_datetime(df.date)
# Create and age variable
df['age'] = df.index.astype('int')
# Create a day of week field
df['day'] = df.date.dt.dayofweek
# Create a month of year field
df['month'] = df.date.dt.month
# Create a boolean for US federal holidays
holidays = calendar().holidays(start=df.date.min(), end=df.date.max())
df['holiday'] = df['date'].isin(holidays).apply(int)
# Rearrange columns
df = df[
    [
        'date',
        'count',
        'age',
        'month',
        'day',
        'holiday'
    ]
]
# Create monthly dummies
tmp = pd.get_dummies(df.month)
tmp.columns = ['month' + str(value) for value in tmp.columns]
df = pd.concat([df, tmp], axis=1)
# Create daily dummies
tmp = pd.get_dummies(df.day)
tmp.columns = ['day' + str(value) for value in tmp.columns]
df = pd.concat([df, tmp], axis=1)
# Reset index
df = df.reset_index(drop=True)
# Drop unnecessary columns
df = df.drop(['month', 'day', 'age'], axis=1)
data = df.dropna()
# Plot the data to help our imaginations
data[['count']].plot(subplots=True, figsize=(15, 8))
plt.xlabel('Time in days since beginning')
plt.ylabel('DAU')
plt.show()

Divide into train and test
[4]:
# Calculate training & testing boundary
test_ind = data[data['date'] == dt.datetime(2017,6,4)].index[0]
data = data.set_index('date')
data_arr = data.values
data_arr = np.expand_dims(data_arr.T, 0) # Get array into right shape for chunking

# Sequentialize the training and testing dataset
data_train, data_test = [], []
for time_series in data_arr:
    data_train.append(time_series[:, :test_ind],)
    data_test.append(time_series[:, test_ind-lookback:])
data_train = np.array(data_train)
data_test = np.array(data_test)
We follow Torchvision in processing examples using Transforms chained together by Compose.
Tensorizecreates a tensor of the example.LogTransformnatural logarithm of the targets after adding the offset (similar to torch.log1p).RemoveLastsubtracts the final value in thelookbackfrom bothlookbackandhorizon.Targetspecifies which index in the array to forecast.
[5]:
transform = [
    {'Tensorize': None},
    {'LogTransform': {'targets': [0], 'offset': 1.0}},
    {'RemoveLast': {'targets': [0]}},
    {'Target': {'targets': [0]}}
]
TimeSeriesDataset inherits from Torch Datasets for use with Torch DataLoader. It handles the creation of the examples used to train the network using lookback and horizon to partition the time series.
[6]:
data_train = TimeSeriesDataset(
    data_train,
    lookback,
    horizon,
    transform=transform
)
data_test = TimeSeriesDataset(
    data_test,
    lookback,
    horizon,
    step=horizon,
    transform=transform
)

# Create mini-batch data loader
dataloader_train = DataLoader(
    data_train,
    batch_size=32,
    shuffle=True,
    pin_memory=True,
    num_workers=1
)
dataloader_test = DataLoader(
    data_test,
    batch_size=3,
    shuffle=False
)
WaveNet
Our network architecture is based on ideas related to WaveNet (see references). We employ the same architecture with a few modifications (e.g., a fully connected output layer for vector forecasts). It turns out that we do not need many layers in this example to achieve state-of-the-art results, most likely because of the simple autoregressive nature of the data.
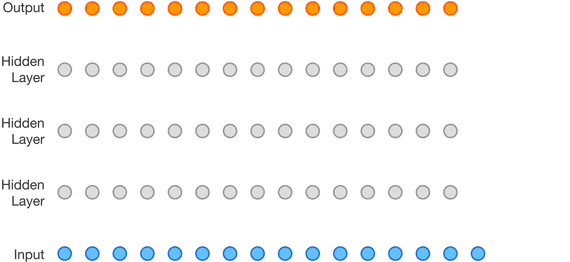
In many ways, a temporal convoluational architecture is among the simplest possible architecures that we could employ using neural networks. In our approach, every layer has the same number of convoluational filters and uses residual connections.
[7]:
# Define the model architecture
n_layers = 6
model = WaveNet(input_channels=21,
                output_channels=1,
                horizon=horizon,
                n_layers=n_layers)

# .. and the optimizer
optim = torch.optim.Adam(model.parameters(), lr=0.001)

# .. and the loss
loss = torch.distributions.Normal

print('Number of model parameters: {}.'.format(model.n_parameters))

print('Receptive field size: {}.'.format(model.receptive_field_size))
Number of model parameters: 116734.
Receptive field size: 64.
[8]:
# Fit the forecaster
forecaster = Forecaster(model, loss, optim, n_epochs=10, device=device)
forecaster.fit(dataloader_train, eval_model=True)
Number of model parameters being fitted: 116734.
Epoch 1/10 [1940/1940 (98%)]    Loss: 0.043966  Elapsed/Remaining: 0m4s/0m32s
Training error: 7.59e+00.
Epoch 2/10 [1940/1940 (98%)]    Loss: -0.156904 Elapsed/Remaining: 0m8s/0m32s
Training error: -2.01e+01.
Epoch 3/10 [1940/1940 (98%)]    Loss: -0.342942 Elapsed/Remaining: 0m13s/0m30s
Training error: -3.69e+01.
Epoch 4/10 [1940/1940 (98%)]    Loss: -0.732276 Elapsed/Remaining: 0m17s/0m26s
Training error: -4.65e+01.
Epoch 5/10 [1940/1940 (98%)]    Loss: -0.605564 Elapsed/Remaining: 0m22s/0m22s
Training error: -4.94e+01.
Epoch 6/10 [1940/1940 (98%)]    Loss: -0.755465 Elapsed/Remaining: 0m26s/0m17s
Training error: -5.77e+01.
Epoch 7/10 [1940/1940 (98%)]    Loss: -0.558515 Elapsed/Remaining: 0m31s/0m13s
Training error: -6.27e+01.
Epoch 8/10 [1940/1940 (98%)]    Loss: -0.746483 Elapsed/Remaining: 0m35s/0m9s
Training error: -6.75e+01.
Epoch 9/10 [1940/1940 (98%)]    Loss: -0.865499 Elapsed/Remaining: 0m40s/0m4s
Training error: -7.02e+01.
Epoch 10/10 [1940/1940 (98%)]   Loss: -0.876480 Elapsed/Remaining: 0m44s/0m0s
Training error: -7.20e+01.
[9]:
# Let's plot the training error
plt.plot(range(1, forecaster.n_epochs+1), forecaster.history['training'])
plt.xlabel('Epoch')
plt.ylabel('Training error')
plt.show()

Evaluation
Before any evaluation score can be calculated, we need to transform the output forecasts.
[10]:
# Get time series of actuals for the testing period
y_test = []
for example in dataloader_test:
    example = data_test.uncompose(example)
    y_test.append(example['y'])

y_test = np.concatenate(y_test)
y_test = np.reshape(y_test, y_test.shape[0] * y_test.shape[2])

# Get corresponding predictions
y_samples = forecaster.predict(dataloader_test, n_samples=100)
# The samples are of the shape (n_samples, n_series, n_covariates, n_timesteps), whereas the actuals are of the shape
# (n_series, n_covariates, n_timesteps)
shape_new = (y_samples.shape[0], # number of samples
             y_samples.shape[2], # number of targets
             y_samples.shape[1] * # number of series
             y_samples.shape[3]) # number of timesteps
y_samples = np.reshape(y_samples, shape_new)

y_test_mean = np.mean(y_samples, axis=0)
y_test_lq = np.percentile(y_samples, q=5, axis=0)
y_test_uq = np.percentile(y_samples, q=95, axis=0)
We calculate the symmetric MAPE and pinball loss, as well as the empirical coverage for the test set data.
[11]:
# Evaluate forecasts
test_smape = metrics.smape(y_samples, y_test)
test_perc = np.arange(1, 99)
test_cov = metrics.coverage(y_samples, y_test, percentiles=test_perc)

print('SMAPE: {}%'.format(test_smape))

plt.figure(figsize=(6, 6))
plt.plot(test_perc, test_perc)
plt.plot(test_perc, test_cov)
plt.xlabel('actual percentile')
plt.ylabel('model percentile')
plt.xlabel('actual percentile')
plt.ylabel('model percentile')
plt.title('Coverage')
plt.show()
SMAPE: 7.026%

Let’s have a closer look at what a forecast looks like. We can use the model output to graph the mean, 95th and 5th percentiles. We’ll also graph the actuals for comparison.
[12]:
# We're printing the test set data and the predictions for the load data
plt.figure(figsize=(16, 4))

plt.plot(y_test, 'k-')
plt.plot(y_test_mean.T, 'g-')
plt.plot(y_test_uq.T, 'g--', alpha=0.25)
plt.plot(y_test_lq.T, 'g--', alpha=0.25)

plt.ylim([0, 0.4e6])
plt.xlim([0, y_test.shape[-1]])

plt.ylabel('DAU')
plt.show()
